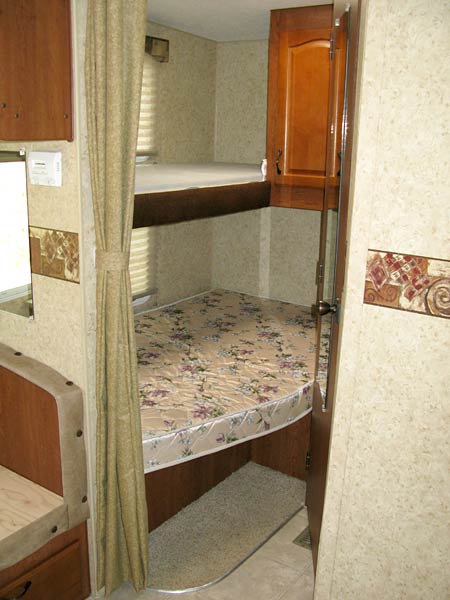
Before the Bunkhouse Remodel
The primary reason for us trading in our 24′ fifth wheel, was to get a larger rig with space to accommodate Rene’s growing jewelry business. We enjoyed our Arctic Fox 245N, and it worked well for us for more the seven years on the road. But as she started to get more orders, and collect more tools and inventory it was clearly running short on storage space, and a place to work. The metal pounding was starting to take a toll on our kitchen table and Rene was constantly seeking out any sturdy surface to stamp her tags, pendants and charms.


We had agreed to save our money for a larger used fifth wheel we would pay cash for, and started researching Arctic Fox floor plans. Then I found the perfect model, the AF275B had a bunkhouse in back that I could rip out and remodel to make a mobile workshop so Rene wouldn’t have to drag out all her tools every time she needed to fulfill one order.
Unfortunately the one I found was sold. Then Rene found one about a month later, at the same dealer! It was the exact same one I saw, which had fallen out of financing. We quickly made a deal over the phone to trade ours in, happy to live by our commitment to never go into debt for an RV.
Here’s the fifth wheel bunkhouse, before my renovation to turn it into our new mobile Agreda HQ and workshop on wheels…
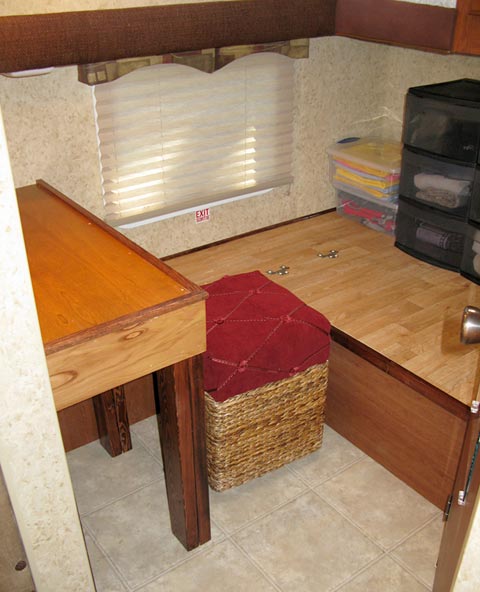
After My DIY RV Remodeling Project
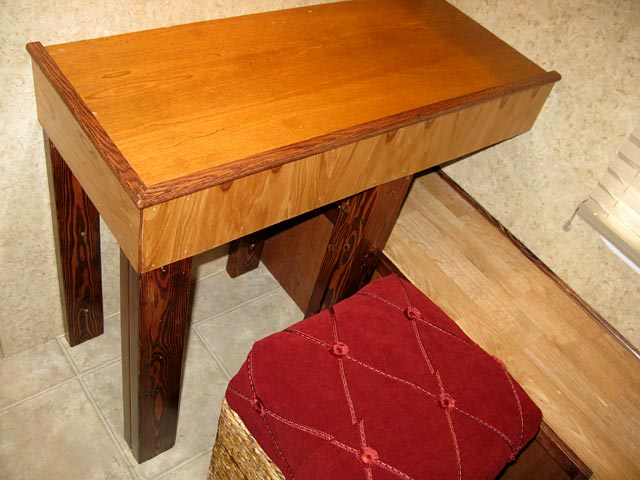
Once I consulted with the boss to confirm where the workbench would go, I started by removing the beds and tearing apart their frames. Not literally, of course. I carefully dismantled the bed frames and re-used most of the framing and paneling. Here’s some photos of the work in progress…
[box type=”note” style=”rounded” border=”full” icon=”liveworkdream.com/wp-content/themes/memorable/functions/images/ico-info.png”]Click thumbnails to scroll through photos at larger size[/box]


First I cut a hole for the new RV electrical outlet.![]() To run the power, I removed the exterior outlet, drilled into the interior wall, attached the wire to a long rod, and had Rene push it in so I could grab it from inside the new hole. After tapping the new wire into the circuit, and replacing the outdoor outlet, I was ready to connect the new outlet inside.
To run the power, I removed the exterior outlet, drilled into the interior wall, attached the wire to a long rod, and had Rene push it in so I could grab it from inside the new hole. After tapping the new wire into the circuit, and replacing the outdoor outlet, I was ready to connect the new outlet inside.


What do you think of Rene’s new workspace?
I do the same type of jewelry and I am loving your desk. My desk is pretty sturdy but not that sturdy. I can really feel the vibration and it is also a lot noisier since it isn’t as solid. We are wanting to get a bus so I am gathering ideas. Thanks for sharing your project!
This is fantastic! Happy for you getting a new rig! Rene, I know you have to be extremely happy for your new workshop! It looks great! Hope you have fun working in it. I know there’s nothing better than a designated work space where you don’t have to constantly be putting things away. Enjoy!
Kim